Migrate Proxmox VE to smaller root disks
Due to some changes in the hardware of my small Proxmox VE server at home, I have to move the OS to smaller disks. Depending on how the OS is set up, this can be quite tricky or quite simple. If Proxmox VE is set up to boot from a ZFS root pool in UEFI mode, you are in luck, as it is actually not too hard.
Despite what is shown in this guide, in real life, consider using the /dev/disk/by-id/ paths because the disks will be exposed by vendor, model and serial number.
This can make it quite a bit easier to identify the actual disks.
So your pool might look something like this:
$ zpool status rpool
  pool: rpool
 state: ONLINE
  scan: scrub repaired 0B in 00:55:40 with 0 errors on Sun Oct 10 01:19:41 2021
config:

	NAME                                               STATE     READ WRITE CKSUM
	rpool                                              ONLINE       0     0     0
	  mirror-0                                         ONLINE       0     0     0
	    ata-HGST_HTS721010A9E630_JR1000D300YJ5E-part3  ONLINE       0     0     0
	    ata-HGST_HTS721010A9E630_JR1000D3033M9E-part3  ONLINE       0     0     0

errors: No known data errors
Starting situation / Prerequisites🔗
We aill assume a Proxmox VE installed on a mirrored ZFS pool in UEFI mode.
The fact that it is booting with UEFI on a ZFS pool is important, because this means it will be using systemd-boot as boot loader and not GRUB!
More details on how such a system is set up and how the EFI partitions are kept in sync between the different disks being part of our bootable ZFS pool/RAID can be found in the Proxmox VE docs.
The pool with which we will be working with in this example looks like this:
$ zpool status rpool
  pool: rpool
 state: ONLINE
  scan: resilvered 1.84G in 00:01:05 with 0 errors on Mon Oct 11 23:22:19 2021
config:

	NAME        STATE     READ WRITE CKSUM
	rpool       ONLINE       0     0     0
	  mirror-0  ONLINE       0     0     0
	    sdd3    ONLINE       0     0     0
	    sda3    ONLINE       0     0     0

errors: No known data errors
As you can see, disks sdd and sda are in use.
This means that we plan to migrate the installation to the smaller disk sdb and sdc.
We will need a Linux Live ISO with ZFS support, like the Proxmox VE install ISO, to boot from.
Recreate partitions🔗
First, we need to recreate the partitions. Since they cannot be cloned, due to the smaller target disks, we will need to do this manually.
Let's print the partition table of the first disk to have a reference:
$ sgdisk -p /dev/sda
[...]
Number  Start (sector)    End (sector)  Size       Code  Name
   1              34            2047   1007.0 KiB  EF02
   2            2048         1050623   512.0 MiB   EF00
   3         1050624       125829086   59.5 GiB    BF01
Seeing the exact sectors helps to recreate them exactly the same way. The first step is to create the partition table or label:
$ sgdisk --clear /dev/sdb
The operation has completed successfully.
Then create the first partition:
$ sgdisk /dev/sdb -a1 --new 1:34:2047 -t0:EF02
The operation has completed successfully.
We specify the disk, the partition number, the start and end sector as we have it in our reference and lastly, the flag / code for it.
Using the -t0 here applies it to the newly created partition, otherwise we would need to set the partition number instead of the 0.
The parameter -a1 is most likely needed, especially if sgdisk does not want to create the partition right away.
The second partition, which is the EFI partition, can be created with the following command:
$ sgdisk /dev/sdb --new 2:2048:1050623 -t0:EF00
The operation has completed successfully.
And then the last one should take up all the rest. Here we will have the big difference to the current OS disks, as we are creating them on smaller disks:
sgdisk /dev/sdb --new 3:1050624 -t0:BF01
The operation has completed successfully.
With this done, check the partition table on the new disk. It should only show a difference in the end sector of the last partition.
Then we clone this partition table to the other new disk and let it recreate all unique IDs:
$ sgdisk /dev/sdb -R /dev/sdc
The operation has completed successfully.
$ sgdisk /dev/sdc -G
The operation has completed successfully.
Be very careful with these to not mix up the order of the disks. When cloning the partition table, the first disk is the source!
Setting up the EFI partitions🔗
Proxmox VE comes with the useful proxmox-boot-tool which makes handling the EFI partitions quite easy.
Before we can initialize it, we need to format it, on both new disks:
$ proxmox-boot-tool format /dev/sdb2
UUID="" SIZE="536870912" FSTYPE="" PARTTYPE="c12a7328-f81f-11d2-ba4b-00a0c93ec93b" PKNAME="sdb" MOUNTPOINT=""
Formatting '/dev/sdb2' as vfat..
mkfs.fat 4.2 (2021-01-31)
Done.
$ proxmox-boot-tool format /dev/sdc2
UUID="" SIZE="536870912" FSTYPE="" PARTTYPE="c12a7328-f81f-11d2-ba4b-00a0c93ec93b" PKNAME="sdc" MOUNTPOINT=""
Formatting '/dev/sdc2' as vfat..
mkfs.fat 4.2 (2021-01-31)
Done.
Once this is done, we can initialize them, meaning that they will get all the necessary files needed for the system to be able to be booted from them and their partition IDs will be stored in the list of EFI partitions, so that they will get updated in the future when new kernel versions are installed.
I am only showing the output for one disk, but don't forget to run it for the second disk as well!
$ proxmox-boot-tool init /dev/sdb2
Re-executing '/usr/sbin/proxmox-boot-tool' in new private mount namespace..
UUID="CA28-F8B6" SIZE="536870912" FSTYPE="vfat" PARTTYPE="c12a7328-f81f-11d2-ba4b-00a0c93ec93b" PKNAME="sdb" MOUNTPOINT=""
Mounting '/dev/sdb2' on '/var/tmp/espmounts/CA28-F8B6'.
Installing systemd-boot..
Created "/var/tmp/espmounts/CA28-F8B6/EFI/systemd".
Created "/var/tmp/espmounts/CA28-F8B6/EFI/BOOT".
Created "/var/tmp/espmounts/CA28-F8B6/loader".
Created "/var/tmp/espmounts/CA28-F8B6/loader/entries".
Created "/var/tmp/espmounts/CA28-F8B6/EFI/Linux".
Copied "/usr/lib/systemd/boot/efi/systemd-bootx64.efi" to "/var/tmp/espmounts/CA28-F8B6/EFI/systemd/systemd-bootx64.efi".
Copied "/usr/lib/systemd/boot/efi/systemd-bootx64.efi" to "/var/tmp/espmounts/CA28-F8B6/EFI/BOOT/BOOTX64.EFI".
Random seed file /var/tmp/espmounts/CA28-F8B6/loader/random-seed successfully written (512 bytes).
Not installing system token, since we are running in a virtualized environment.
Created EFI boot entry "Linux Boot Manager".
Configuring systemd-boot..
Unmounting '/dev/sdb2'.
Adding '/dev/sdb2' to list of synced ESPs..
Refreshing kernels and initrds..
Running hook script 'proxmox-auto-removal'..
Running hook script 'zz-proxmox-boot'..
Copying and configuring kernels on /dev/disk/by-uuid/C926-CB10
	Copying kernel and creating boot-entry for 5.11.22-4-pve
	Copying kernel and creating boot-entry for 5.11.22-5-pve
Copying and configuring kernels on /dev/disk/by-uuid/C927-871F
	Copying kernel and creating boot-entry for 5.11.22-4-pve
	Copying kernel and creating boot-entry for 5.11.22-5-pve
Copying and configuring kernels on /dev/disk/by-uuid/CA28-F8B6
	Copying kernel and creating boot-entry for 5.11.22-4-pve
	Copying kernel and creating boot-entry for 5.11.22-5-pve
You can see that it creates the default directory structure, boot loader binaries and the current kernel images with matching boot loader entries.
Create new ZFS root pool and replicate data🔗
Now we can create the new root pool on the smaller disks.
$ zpool create -o ashift=12 new-rpool mirror /dev/sdb3 /dev/sdc3
We will rename the new-rpool to rpool later on.
To facilitate the ZFS send & receive functionality, we need to snapshot the whole pool recursively. This is the point at which the system will be copied to the new pool. Make sure you have everything written to the root disks that you need to keep. It is also a good idea to stop all currently running guests.
zfs snapshot -r rpool@migrate
Sending all data over to the new pool:
$ zfs send -R rpool@migrate | zfs recv new-rpool -F
Depending on the size of your root pool, this will take some time.
Once it is done, we can set a few properties the way they are in the current rpool.
$ zpool set bootfs=new-rpool/ROOT/pve-1 new-rpool
We will need to change that once we renamed the pool.
Rename pool🔗
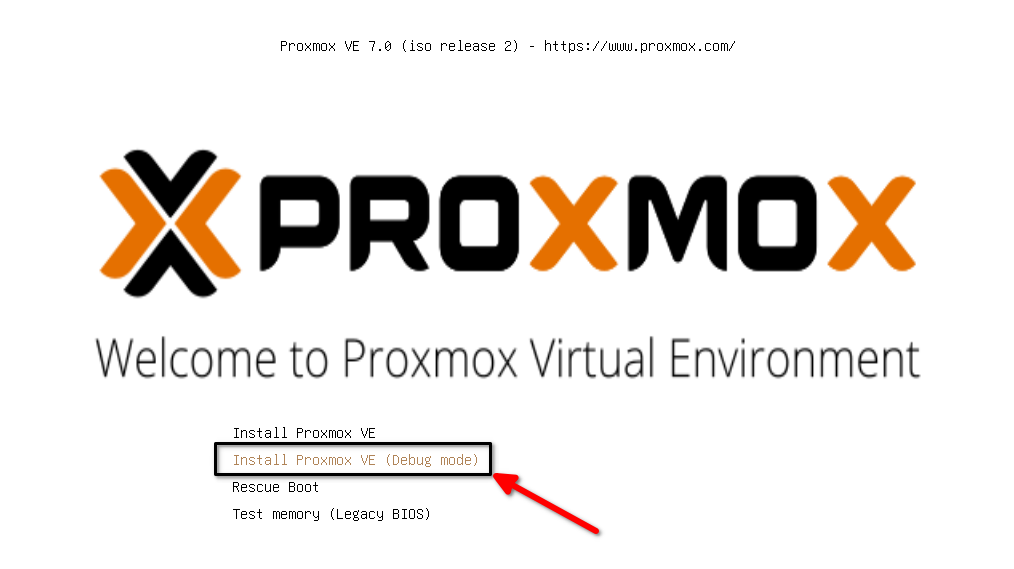
Now we reboot the server and boot into the Proxmox VE ISO. Select the "Debug mode" installation option at the splash screen.
NOTE: in recent versions of the Proxmox VE installer, the "Debug Mode" options are in the Advanced submenu!
This will drop us into a shell at various steps, meaning that we do have a live Linux ISO with full ZFS integration.
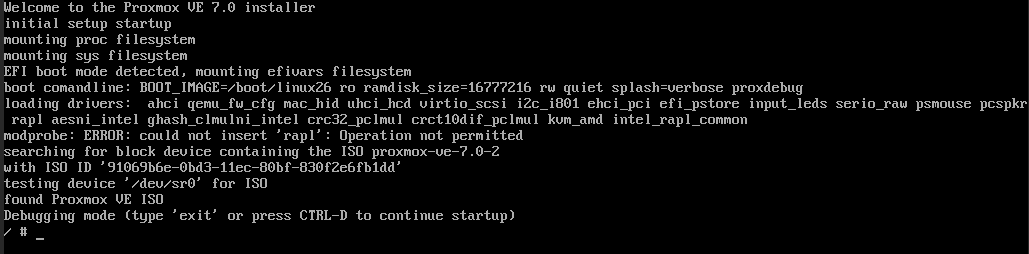
The first shell will be the initramfs where we will exit it quickly either by entering exit or pressing CTRL+D.
After this, we will be dropped into a shell of the booted live system:
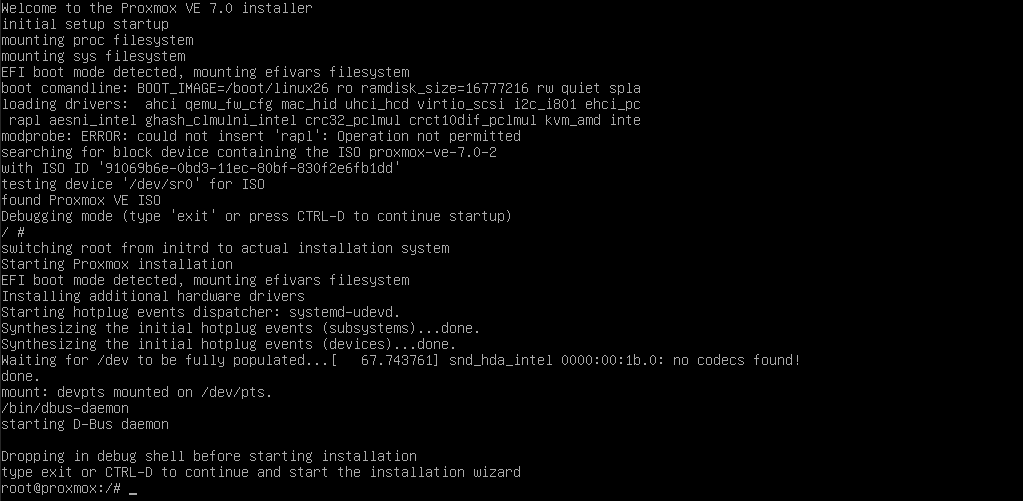
At this point we can check which ZFS pools are available by running zpool import without any further parameters:
$ zpool import
   pool: new-rpool
     id: 10675147693146519380
  state: ONLINE
status: The pool was last accessed by another system.
 action: The pool can be imported using its name or numeric identifier and
	the '-f' flag.
   see: https://openzfs.github.io/openzfs-docs/msg/ZFS-8000-EY
 config:

	new-rpool   ONLINE
	  mirror-0  ONLINE
	    sdb3    ONLINE
	    sdc3    ONLINE

   pool: rpool
     id: 7926877051789789070
  state: ONLINE
status: The pool was last accessed by another system.
 action: The pool can be imported using its name or numeric identifier and
	the '-f' flag.
   see: https://openzfs.github.io/openzfs-docs/msg/ZFS-8000-EY
 config:

	rpool       ONLINE
	  mirror-0  ONLINE
	    sdd3    ONLINE
	    sda3    ONLINE
We can see the rpool and the new-rpool pools.
Next we will rename rpool to old-rpool and then new-rpool to the now free rpool.
By specifying a second name during the import, we can rename the pool.
$ zpool import rpool old-rpool -f
$ zpool import new-rpool rpool -f
Once they are imported with their new names, we can export them.
$ zpool export rpool
$ zpool export old-rpool
Remove old disks and boot🔗
Now power off the machine and remove the old disks. Once you start it again, you might have to define the boot disks in the BIOS accordingly. They should be detected as bootable UEFI disks.
If we did everything right, the system should be able to boot up normally.
Final cleanup🔗
There is one last thing that we need to clean up.
Try running proxmox-boot-tool status, and it will show you some warnings about missing partitions.
$ proxmox-boot-tool status
Re-executing '/usr/sbin/proxmox-boot-tool' in new private mount namespace..
System currently booted with uefi
WARN: /dev/disk/by-uuid/C926-CB10 does not exist - clean '/etc/kernel/proxmox-boot-uuids'! - skipping
WARN: /dev/disk/by-uuid/C927-871F does not exist - clean '/etc/kernel/proxmox-boot-uuids'! - skipping
CA28-F8B6 is configured with: uefi (versions: 5.11.22-4-pve, 5.11.22-5-pve)
CA76-3140 is configured with: uefi (versions: 5.11.22-4-pve, 5.11.22-5-pve)
Those are the EFI partitions that were on the old, now removed, disks.
We can remove them by following the hint in the warning message and editing the file /etc/kernel/proxmox-boot-uuids.
Remove the lines with the partition GUIDs that had the warnings.
If you run the proxmox-boot-tool status again, it should work without any warnings and just show the two current EFI partitions.
Conclusion🔗
Congrats, everything should be fine now!
You moved your Proxmox VE installation to a new set of smaller disks by manually recreating a matching partition table, initialized the EFI partitions and migrated the system itself by using the ZFS send & receive mechanism.